
Configuration
Typically no additional configuration of OpenWebStart is necessary. All required configuration options are already included in the installation package as provided by Mercedes-Benz AG. For more information, see the Administration Guide.
Table of contents
Proxy server configuration
If you use a proxy server to access the Internet, this must be configured in OpenWebStart:
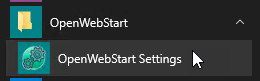
- Open the Windows Start menu and then click on "OpenWebStart Settings":
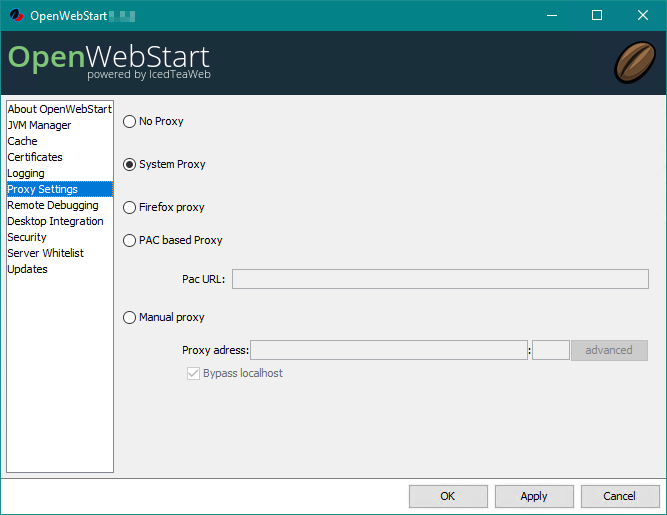
- Then click on "Proxy Settings" and enter your proxy settings.
Please contact your local IT department if you require help with this step.
Important!
Unfortunately in all current versions of OpenWebstart the proxy server support
is not fully working without limitations. The following list is based on
OWS V1.1.4:
- Option System Proxy: Works, but depending on "PAC based" or "Manual" it has the limitations as described below.
- Option Firefox proxy: Not tested, as Firefox is not on the list of supported browsers for our applications.
- Option PAC based Proxy: proxy.pac basically works, but does not support any authentication (NTLM, basic auth).
- Option Manual proxy: Works, but does not support any authentication (NTLM, basic auth). If you enable the "Manual Proxy Server" option, please also click on "advanced" and activate "Use the same proxy server for all protocols". Additionally "Bypass localhost" must be activated.
JNLP settings in the JVM manager
Some settings, which derive from a standard installation of
OpenWebStart are especially important for operation of the
Aftersales applications. If you use the
OWS installation package offered by us
and install it according to our installation manual, then
OpenWebStart will use these settings automatically when started.
This section describes adjusting the settings manually, in case they must
be checked or recovered.
To start the Aftersales applications OpenWebStart must download download a
Java Virtual Machine (JVM) and store it in a local directory. In the .jnlp
file, which launches the application, we define which JVM exactly has to be
downloaded by OWS.
Through the following settings we ensure, that OWS always uses the JVM, which
we define in the .jnlp file.
- Start "OpenWebStart/OpenWebStart settings" from the Windows start menu.
- In the "OpenWebStart settings" change to the page "JVM Manager".
- In the bottom right corner click on "Settings".
- Following values must be set for a correct function:
Update strategy: "Always download newer version"
Allow server from JNLP file: [V] (checked)
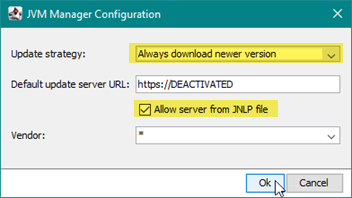
- Save any changes and close the OpenWebStart settings
For usage of OpenWebStart please continue reading on the User guide page.
Last update: Wed 26 Jul 2023 02:57:38 PM CEST